
QGIS Project Basics: Saving and Layer Errors
What you'll learn
- How to save and manage QGIS projects
- How to share QGIS project files
- How to fix layer errors when you open a QGIS project
Recommended for
- Anyone who wants to learn how to manage and share QGIS projects
- Anyone who has been rebuilding their map in QGIS from scratch every time
- Anyone who has seen the Handle Unavailable Layers dialog in QGIS
Introduction
In QGIS, you can add layers, change their styling, and save the result as a project file. With a project file, you can save your work partway through and you do not have to set up styling again. It is a very useful feature.
This article explains how to manage and save projects in QGIS.
What is a project file?
A “project” in QGIS records layer and style information, the work you have done so far, and more. A project saved as a file is called a “project file.”
A project file contains the following information:
-
Layer information: which data is used, the layer types, file paths, and display settings
-
Style information: how the map looks, such as layer symbols, colors, and labels
-
Map settings: basic settings for the whole project, such as the coordinate reference system (CRS), scale, and background color
-
Layout information: print layout settings
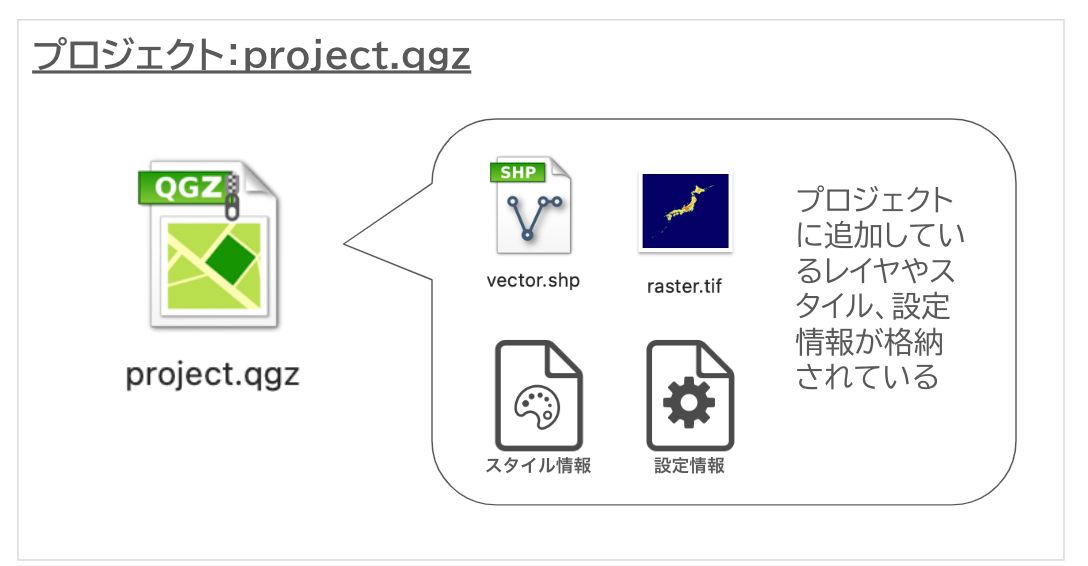
A project file stores layers, styles, and settings

A project file saves your progress and settings so that you can reproduce them later. You can reopen it to continue editing and analyzing.
Create a working folder and manage your data
A QGIS project file refers to the layers you add by relative path.
A relative path specifies where a file is stored relative to the project file. If you move the layers or the project file to a different location, or rename the files, QGIS can no longer find the layers, and the data does not appear.
To prevent this, keep the layers and the project file in the same working folder. The relative paths are then less likely to break when you move the folder or copy it to another computer, and the project opens smoothly. Keeping all the data in the working folder also makes management easier, especially when several users share a project or when you make backups.

Create and save a new project
This section covers the steps from creating a new project to saving it as a project file.
Create a new project
Create a working folder anywhere you like and move your data into it. Then start QGIS and create a new project.
On the menu bar, select Project → New to create a new project.

You can also create a new project from Project Templates on the Welcome Page that appears when you start QGIS.

After you create the project, customize your map by adding layers and setting styles and labels. This example adds administrative boundary data and styles it as shown in the figure below.

Save the project
When you finish adding layers and changing styles, save the project.
If you have not saved the project yet, the name above the menu bar reads Untitled Project. An asterisk before the project name means the project has changes since the last save. If you close the project while the asterisk is showing and without saving, those changes are lost, so be careful.

On the menu bar, select Project → Save.

The Choose a QGIS project file dialog opens. Go to the location where you created the working folder.
Next, enter the project name in File name at the bottom. This article uses data of Japan, so enter japan. Then click the Save button. The file type is explained in a later section.

The project file is now created. The name above the menu bar also changes to japan.

The project file also appears as japan.qgz in the location you chose for saving it.

As explained above, keep the project file and the data the project uses in a single folder.
Open a project file
Now that the project file is saved, open it. If the project you just saved is still open, select Project → Close on the menu bar to close it.

There are several ways to open a project. Each is described below.
Open from recent projects
The Welcome Page that appears when you start QGIS lists your recently used projects under Recent Projects.
Double-click the project you want to open.

QGIS restores the project to the state it was in when you saved it.

Choose Project → Open
The second method is Project → Open on the menu bar (the third item from the top).

Click Open to display the Open Project dialog. Select the project file you want to open, then click the Open button at the bottom.

Double-click the project file
Double-click the project file directly. QGIS starts and opens the project file.
This method may not work if your computer's settings do not associate project files with the QGIS application.

Share a project
To share a project with other users, or to continue working on another computer, share all the data files the project uses, not just the project file.
As explained above, QGIS refers to layers by relative path. If the data is scattered across different folders, you risk accidentally renaming a folder or losing track of where the data is. When you open the project, QGIS then cannot find where the data is saved, and the data does not appear.
So when you manage projects and data, keep the project file and all the data it uses in the same folder.
When the project file and every layer you use are saved in one working folder, compress the whole working folder into a Zip file and share it with other users.

The people who receive the data can extract the Zip file and open the project file to see the project restored to the state it was in when you saved it.
About project file extensions
QGIS project files have one of two extensions: .qgz or .qgs.
.qgz is the standard format since QGIS 3.2. It is compressed in ZIP format, so the file size is smaller. .qgs is an uncompressed file in XML format.
If you only use QGIS 3.2 or later, save in the current standard .qgz format.

If a layer error appears when you open a project
When you open a project, the Handle Unavailable Layers dialog may appear.
As explained above, a QGIS project file refers to the layers you add by relative path. If you move the project file or the data, or rename the data files, QGIS cannot find the layers and this error occurs.

To fix it, select the layer with the error, then click the Browse button at the bottom and choose the target file. You can also click the Auto-Find button, and QGIS may find the target files automatically.
If a folder that holds layers was renamed inside the working folder, QGIS finds the files automatically. If a file was renamed, QGIS cannot find it, so select the file you want with the Browse button.

Conclusion
Managing and saving projects in QGIS is a very useful feature for keeping an efficient working environment.
Saving projects properly also makes sharing with other users easier, so manage your data by keeping everything within the working folder.

QGIS LAB is a comprehensive information hub for QGIS, the open-source GIS software. Under the concept of “Geospatial for Greater Good,” we share the knowledge and skills to open up the world through location data.


